
Peppermint Bark Cheesecake Recipe
Introduction
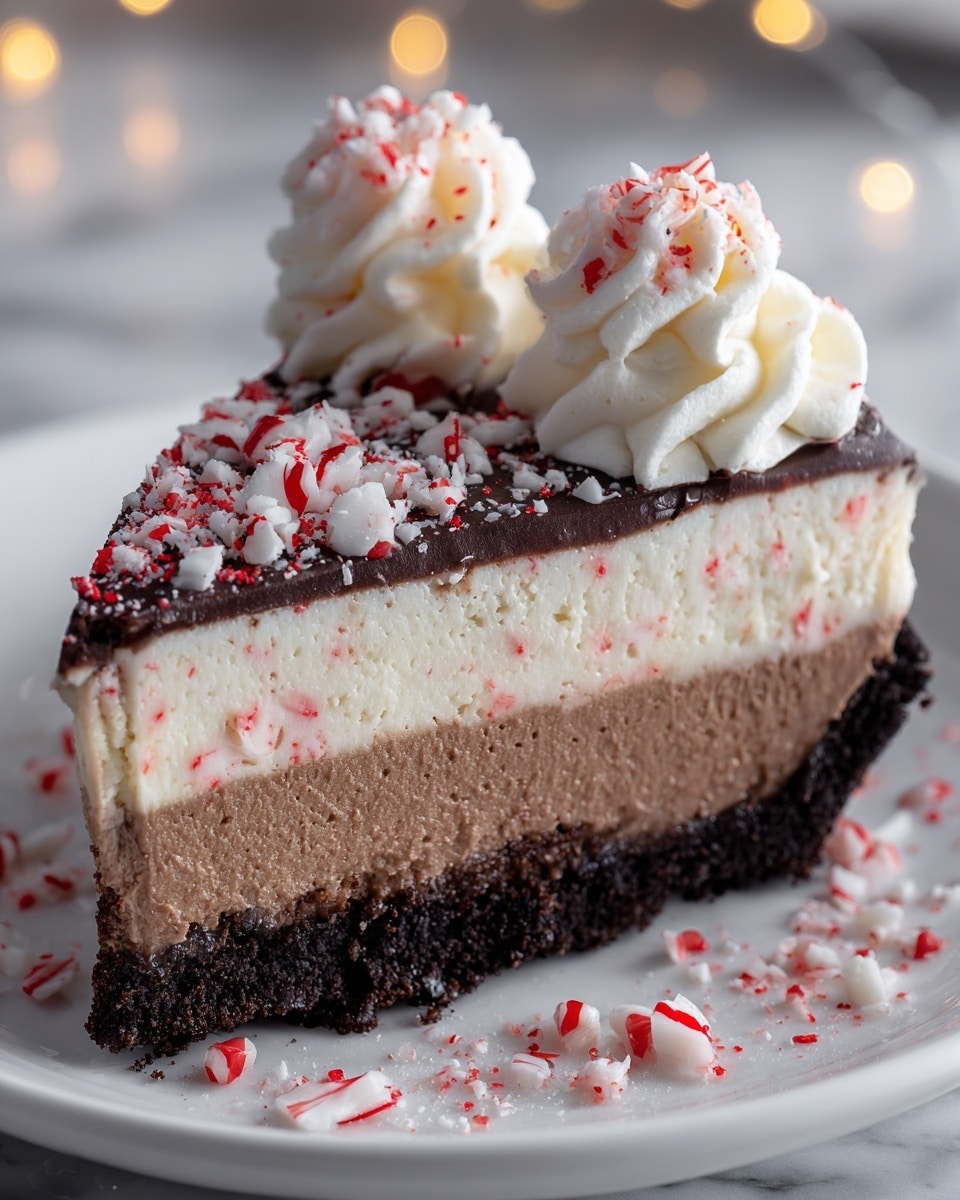
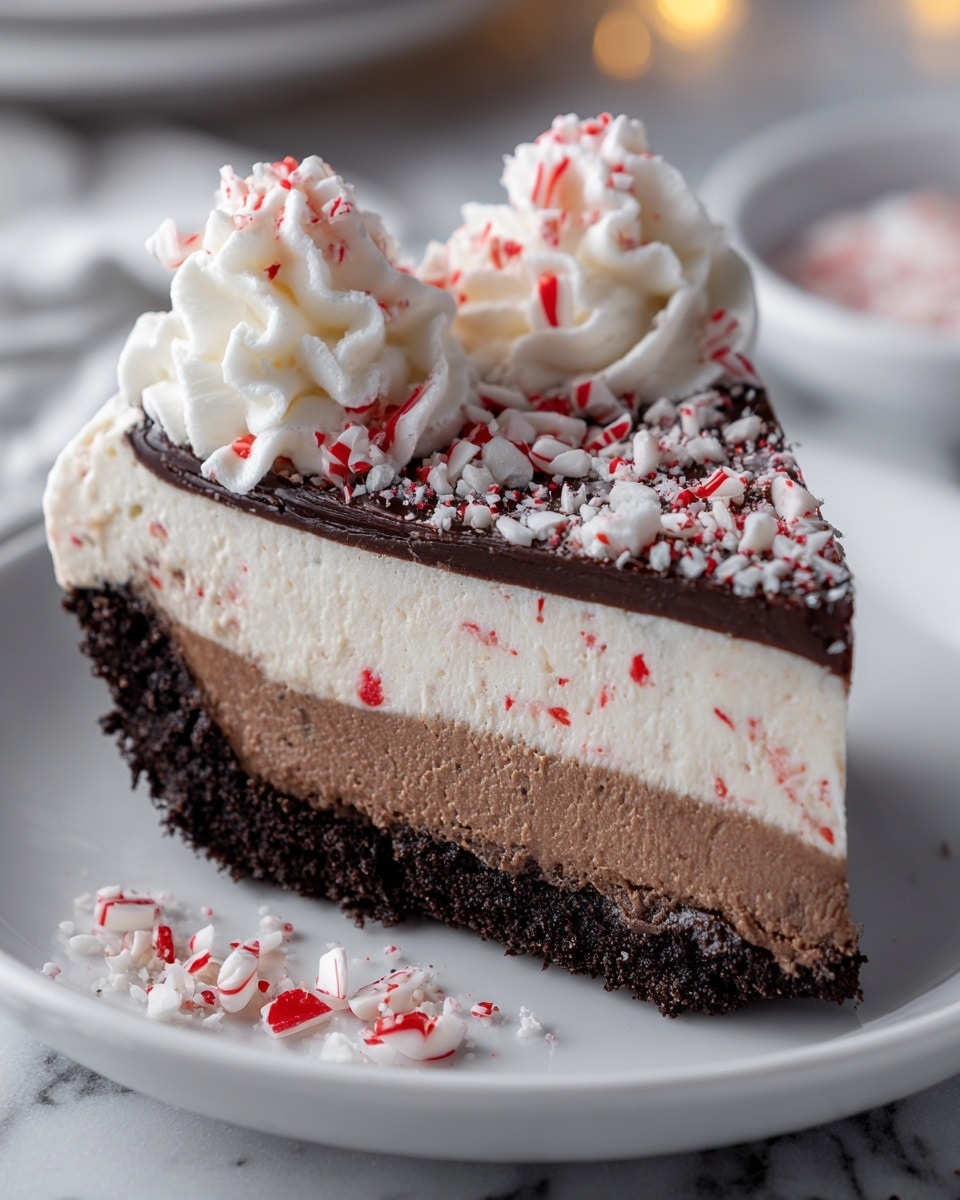
Peppermint Bark Cheesecake is a delightful holiday treat that combines creamy cheesecake with festive peppermint and rich chocolate layers. This no-bake dessert is perfect for sharing and impresses with its beautiful layers and refreshing flavors.
Ingredients
- 1 1/2 cups chocolate cookie crumbs (such as Oreo cookies)
- 1/4 cup granulated sugar
- 1/2 cup unsalted butter, melted
- 16 oz (450 g) cream cheese, softened
- 1 cup powdered sugar
- 1 teaspoon vanilla extract
- 1 teaspoon peppermint extract
- 1 cup heavy cream
- 1/2 cup crushed peppermint candies (plus extra for topping)
- 1/2 cup semi-sweet chocolate chips (for the chocolate layer)
- 1 cup whipped cream (store-bought or homemade)
- Additional crushed peppermint candies
- Chocolate shavings or chocolate curls (optional)
Instructions
- Step 1: Combine the chocolate cookie crumbs, granulated sugar, and melted butter in a medium bowl until well mixed. Press the mixture firmly into the bottom of a 9-inch springform pan to form an even crust layer. Chill in the refrigerator while preparing the filling.
- Step 2: In a large bowl, beat the softened cream cheese with an electric mixer until smooth and creamy. Gradually add powdered sugar, vanilla extract, and peppermint extract, mixing until combined. In a separate bowl, whip the heavy cream until stiff peaks form. Gently fold the whipped cream into the cream cheese mixture until fully incorporated. Fold in the crushed peppermint candies.
- Step 3: Pour half of the cheesecake filling over the chilled crust and spread evenly. Melt the semi-sweet chocolate chips using a microwave or double boiler, then let cool slightly. Pour the melted chocolate over the cheesecake layer and spread evenly. Top with the remaining cheesecake filling and smooth the surface.
- Step 4: Cover the cheesecake with plastic wrap and refrigerate for at least 4 hours, or overnight, until fully set.
- Step 5: Remove the cheesecake from the springform pan. Top with whipped cream and sprinkle additional crushed peppermint candies and optional chocolate shavings or curls. Slice into wedges and serve chilled.
Tips & Variations
- Use chocolate graham crackers instead of cookie crumbs for a richer chocolate crust.
- Adjust peppermint extract to taste or substitute mint chocolate chips for a stronger mint flavor.
- Garnish with crushed Oreo cookies, mini chocolate chips, or a drizzle of chocolate sauce for added decoration.
Storage
Store leftover peppermint bark cheesecake in an airtight container in the refrigerator for up to 5 days. For longer storage, freeze tightly wrapped in plastic wrap and aluminum foil for up to 2 months. Thaw in the refrigerator before serving. Reheat is not recommended as the texture may change.
How to Serve
Serve this delicious recipe with your favorite sides.
FAQs
Can I make this cheesecake without a springform pan?
A springform pan is ideal for easy removal, but you can use a regular pan lined with parchment paper for easier removal of the cheesecake.
Can I substitute the peppermint candies?
Yes, you can substitute crushed candy canes or skip the candies for a simpler flavor, though they add a nice crunch and festive touch.
Print
Peppermint Bark Cheesecake Recipe
- Total Time: 4 hours 30 minutes
- Yield: 12 servings 1x
Description
This Peppermint Bark Cheesecake is a festive and indulgent dessert perfect for the holiday season. Featuring a rich chocolate cookie crust, a creamy peppermint-flavored cheesecake filling, and a luscious layer of melted chocolate, it’s topped with whipped cream and crushed peppermint candies for a refreshing finish. This no-bake-style cheesecake requires chilling rather than baking and offers a delightful blend of creamy texture and minty chocolate flavors.
Ingredients
For the Crust:
- 1 1/2 cups chocolate cookie crumbs (such as Oreo cookies)
- 1/4 cup granulated sugar
- 1/2 cup unsalted butter, melted
For the Cheesecake Filling:
- 16 oz (450 g) cream cheese, softened
- 1 cup powdered sugar
- 1 teaspoon vanilla extract
- 1 teaspoon peppermint extract
- 1 cup heavy cream
- 1/2 cup crushed peppermint candies (plus extra for topping)
- 1/2 cup semi-sweet chocolate chips (for the chocolate layer)
For the Topping:
- 1 cup whipped cream (store-bought or homemade)
- Additional crushed peppermint candies
- Chocolate shavings or chocolate curls (optional)
Instructions
- Prepare the Crust: In a medium bowl, combine the chocolate cookie crumbs, granulated sugar, and melted butter until well mixed. Press the mixture firmly into the bottom of a 9-inch springform pan forming an even layer. Chill the crust in the refrigerator while preparing the cheesecake filling.
- Make the Cheesecake Filling: Beat the softened cream cheese in a large mixing bowl using an electric mixer until smooth and creamy. Gradually add powdered sugar, vanilla extract, and peppermint extract, mixing until fully incorporated and smooth. In a separate bowl, whip the heavy cream until stiff peaks form, then gently fold the whipped cream into the cream cheese mixture. Finally, fold in the crushed peppermint candies.
- Layer the Cheesecake: Pour half of the cheesecake filling over the chilled crust and spread evenly. Melt the semi-sweet chocolate chips in the microwave or double boiler, let cool slightly, then pour over the first cheesecake layer spreading evenly. Top this with the remaining cheesecake filling and smooth the surface.
- Chill the Cheesecake: Cover the assembled cheesecake with plastic wrap and refrigerate for at least 4 hours or preferably overnight until fully set.
- Serve: Remove the cheesecake from the springform pan once set. Top with whipped cream, sprinkle additional crushed peppermint candies, and optionally garnish with chocolate shavings or curls. Slice into wedges and serve chilled.
Notes
- Use chocolate graham crackers instead of chocolate cookies for a different crust texture.
- Adjust peppermint extract according to your taste preference for mintiness.
- Substitute mint chocolate chips for semi-sweet chocolate for enhanced mint flavor.
- Store leftover cheesecake in an airtight container in the refrigerator for up to 5 days or freeze for up to 2 months wrapped tightly.
- Melting chocolate properly by cooling slightly prevents it from mixing into the cheesecake filling layer.
- Prep Time: 30 minutes
- Cook Time: 0 minutes
- Category: Dessert
- Method: No-Cook
- Cuisine: American
Keywords: Peppermint Bark Cheesecake, no-bake cheesecake, holiday dessert, peppermint dessert, chocolate cheesecake, festive cheesecake
