
Banana Pudding Brownies Recipe
Introduction
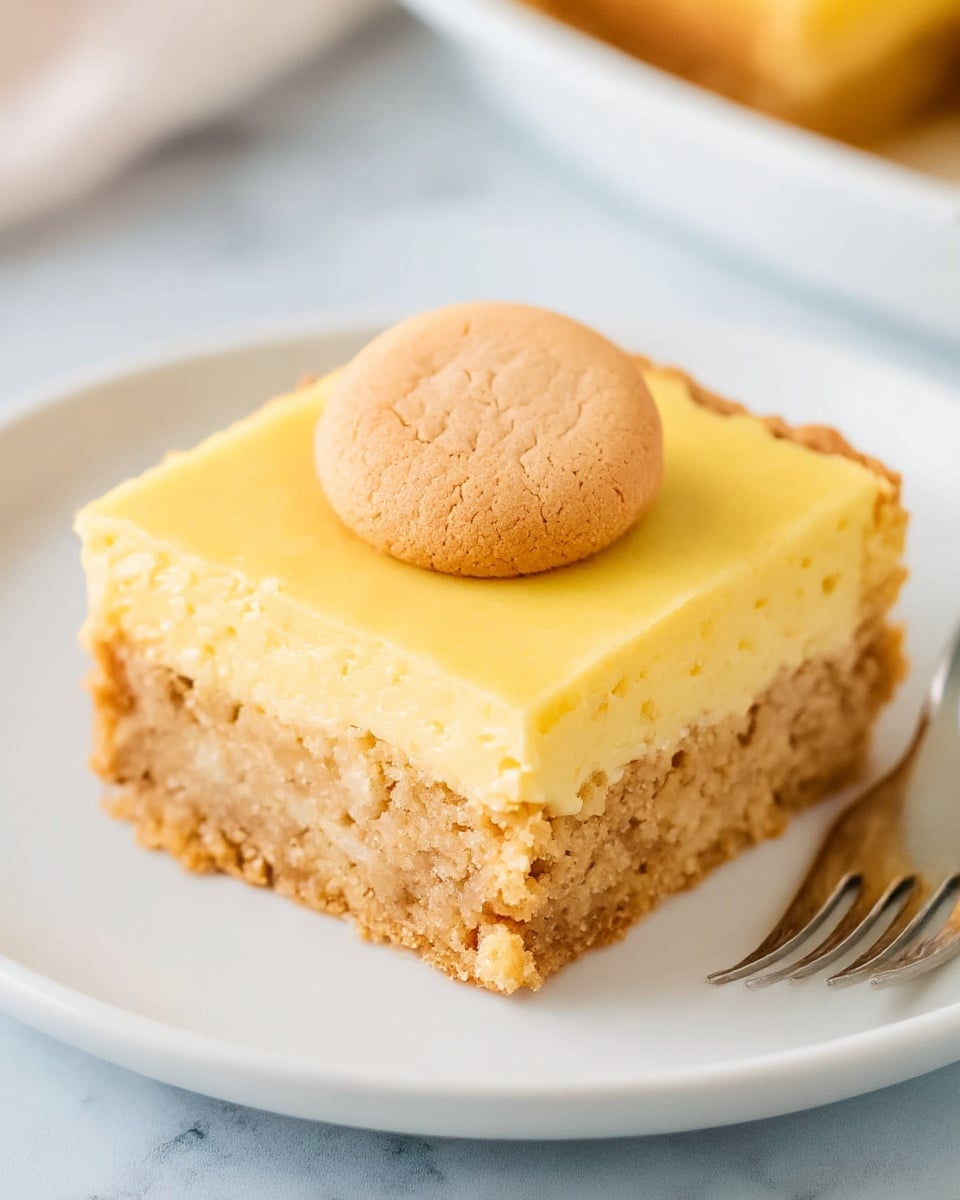
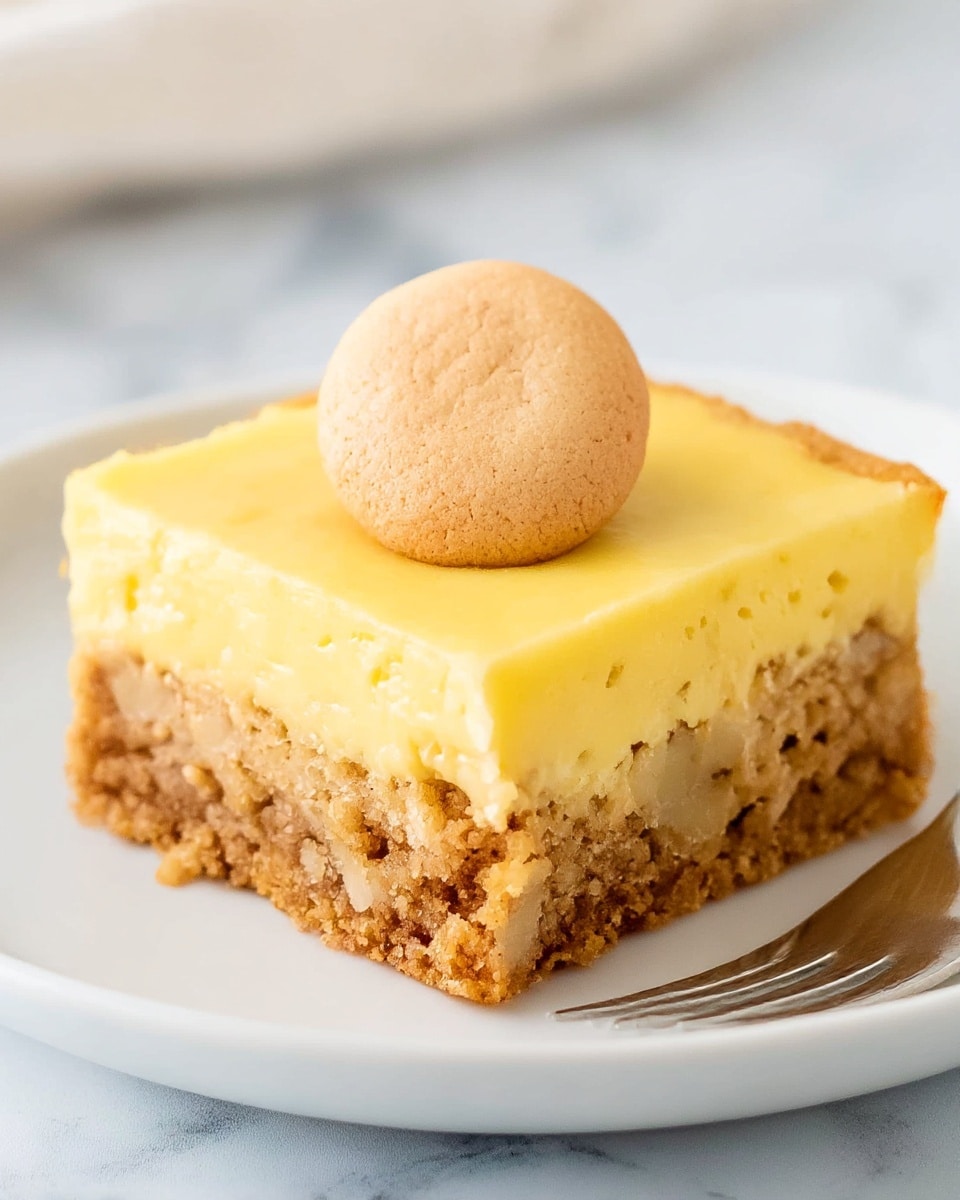
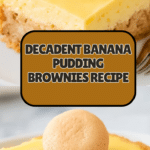
Banana Pudding Brownies combine the rich, fudgy texture of classic brownies with the creamy sweetness of banana pudding for a truly irresistible dessert. This layered treat is perfect for banana lovers looking to mix up their usual brownie routine.
Ingredients
- 1 box brownie mix (or homemade for a 9×13 pan)
- Ingredients required for the brownie mix (eggs, oil, water)
- 1 (3.4 oz) box instant banana pudding mix
- 1½ cups cold milk
- 1 tsp vanilla extract
- 1½–2 cups whipped topping (Cool Whip) or homemade whipped cream
- 1–1½ cups crushed vanilla wafers
- Banana slices (optional, for garnish)
Instructions
- Step 1: Prepare brownie batter according to package or homemade recipe directions. Pour into a greased 9×13-inch pan and bake as directed. Allow brownies to cool completely.
- Step 2: In a bowl, whisk together the instant banana pudding mix, cold milk, and vanilla extract until thickened, about 2 minutes. Refrigerate for 5 minutes to set slightly.
- Step 3: Spread the banana pudding evenly over the cooled brownies to create the second layer.
- Step 4: Gently spread the whipped topping over the banana pudding layer. Sprinkle crushed vanilla wafers evenly on top for added crunch.
- Step 5: Refrigerate the assembled dessert for 1 to 2 hours to allow it to set. Slice and serve chilled. Optionally, garnish with banana slices before serving.
Tips & Variations
- Use homemade whipped cream instead of store-bought for a fresher taste.
- Try adding chopped nuts or mini chocolate chips to the brownie batter for extra texture.
- For a stronger banana flavor, fold mashed ripe bananas into the pudding layer before spreading.
- To make individual servings, assemble in small jars or cups and chill until set.
Storage
Store the banana pudding brownies covered in the refrigerator for up to 3 days. Keep chilled to maintain the pudding texture and whipped topping freshness. Reheat is not recommended, as the layers are best served cold.
How to Serve
Serve this delicious recipe with your favorite sides.
FAQs
Can I use homemade brownies instead of a boxed mix?
Absolutely! Homemade brownies work wonderfully and allow you to customize sweetness and texture.
Is it necessary to chill the dessert before serving?
Yes, chilling helps the pudding set properly and makes the layers firm, enhancing the overall flavor and structure.
Print
Banana Pudding Brownies Recipe
- Total Time: 1 hour 45 minutes
- Yield: 12 servings 1x
Description
A delightful dessert combining rich, fudgy brownies with creamy banana pudding, topped with whipped cream and crunchy vanilla wafer crumbs for a perfect balance of flavors and textures.
Ingredients
Brownie Layer
- 1 box brownie mix (or homemade for a 9×13 pan)
- Ingredients required for the mix (eggs, oil, water as per box instructions)
Banana Pudding Layer
- 1 (3.4 oz) box instant banana pudding mix
- 1½ cups cold milk
- 1 tsp vanilla extract
Topping
- 1½–2 cups whipped topping (such as Cool Whip) or homemade whipped cream
- 1–1½ cups crushed vanilla wafers
- Banana slices (optional, for garnish)
Instructions
- Bake the Brownies: Prepare the brownie batter according to the package or your homemade recipe instructions. Pour the batter into a greased 9×13-inch pan and bake as directed until set. Allow the brownies to cool completely in the pan before proceeding to the next step.
- Prepare the Pudding: In a medium bowl, whisk together the instant banana pudding mix, cold milk, and vanilla extract until the mixture thickens, about 2 minutes. Then refrigerate the pudding for 5 minutes to allow it to set further.
- Assemble Layers: Evenly spread the chilled banana pudding over the cooled brownie layer, creating a smooth, creamy surface.
- Add Topping: Gently spread the whipped topping over the pudding layer to cover it uniformly. Then sprinkle the crushed vanilla wafers evenly on top for a crunchy texture and garnish with optional banana slices if desired.
- Chill: Place the assembled dessert in the refrigerator for 1 to 2 hours to allow the layers to set properly. Slice into squares and serve chilled for the best flavor and texture experience.
Notes
- Use homemade whipped cream for a fresher topping alternative.
- For extra banana flavor, add fresh banana slices between the pudding and whipped topping layers.
- Make sure brownies are completely cooled before adding the pudding layer to prevent melting.
- Store leftovers covered in the refrigerator for up to 3 days.
- To make it gluten-free, use a gluten-free brownie mix and gluten-free vanilla wafers.
- Prep Time: 15 minutes
- Cook Time: 25 minutes
- Category: Dessert
- Method: Baking
- Cuisine: American
Keywords: banana pudding brownies, layered banana dessert, banana pudding, brownies, whipped cream topping, vanilla wafers dessert
