
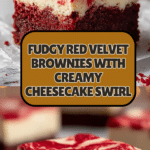
Classic Red Velvet Brownies with Cheesecake Layer Recipe
Introduction
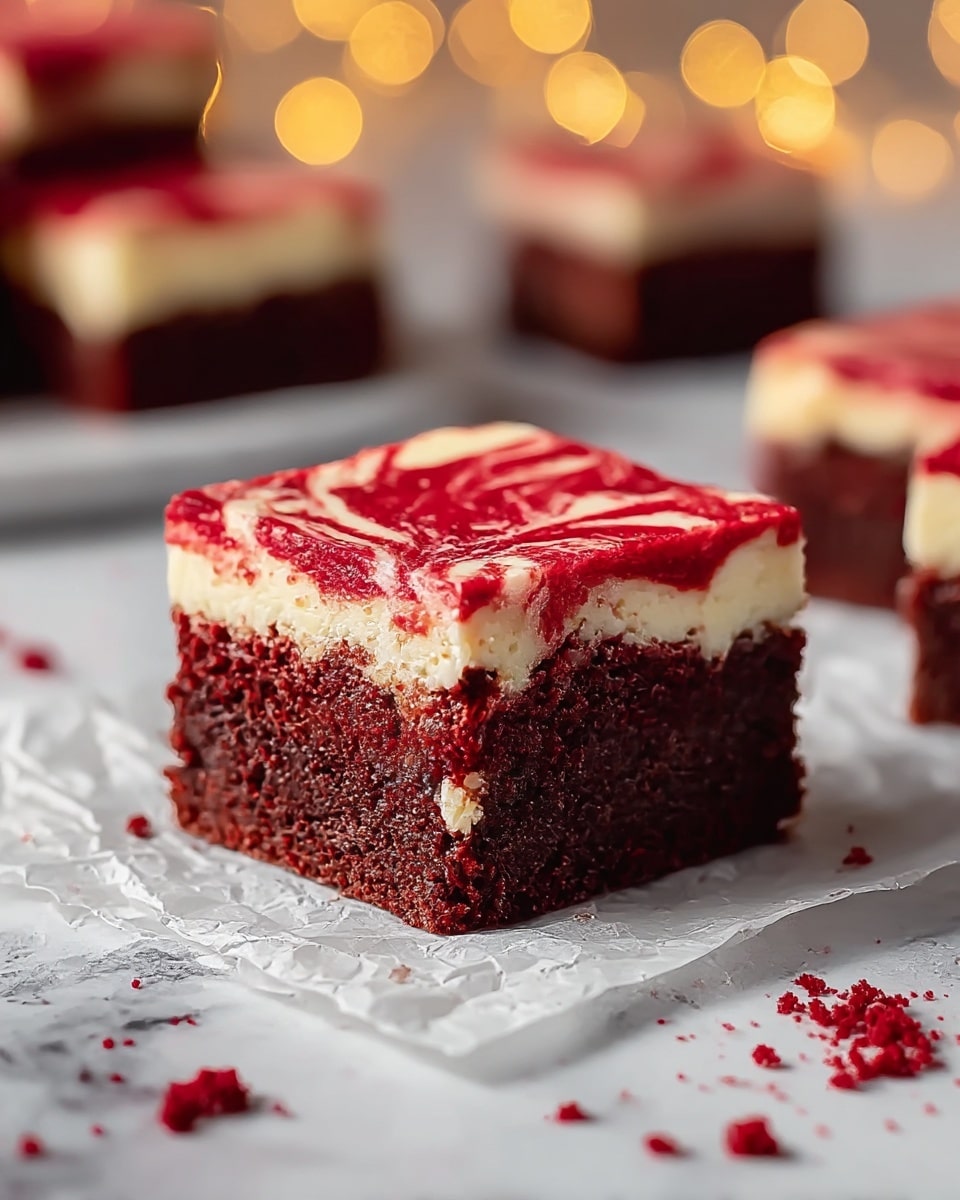
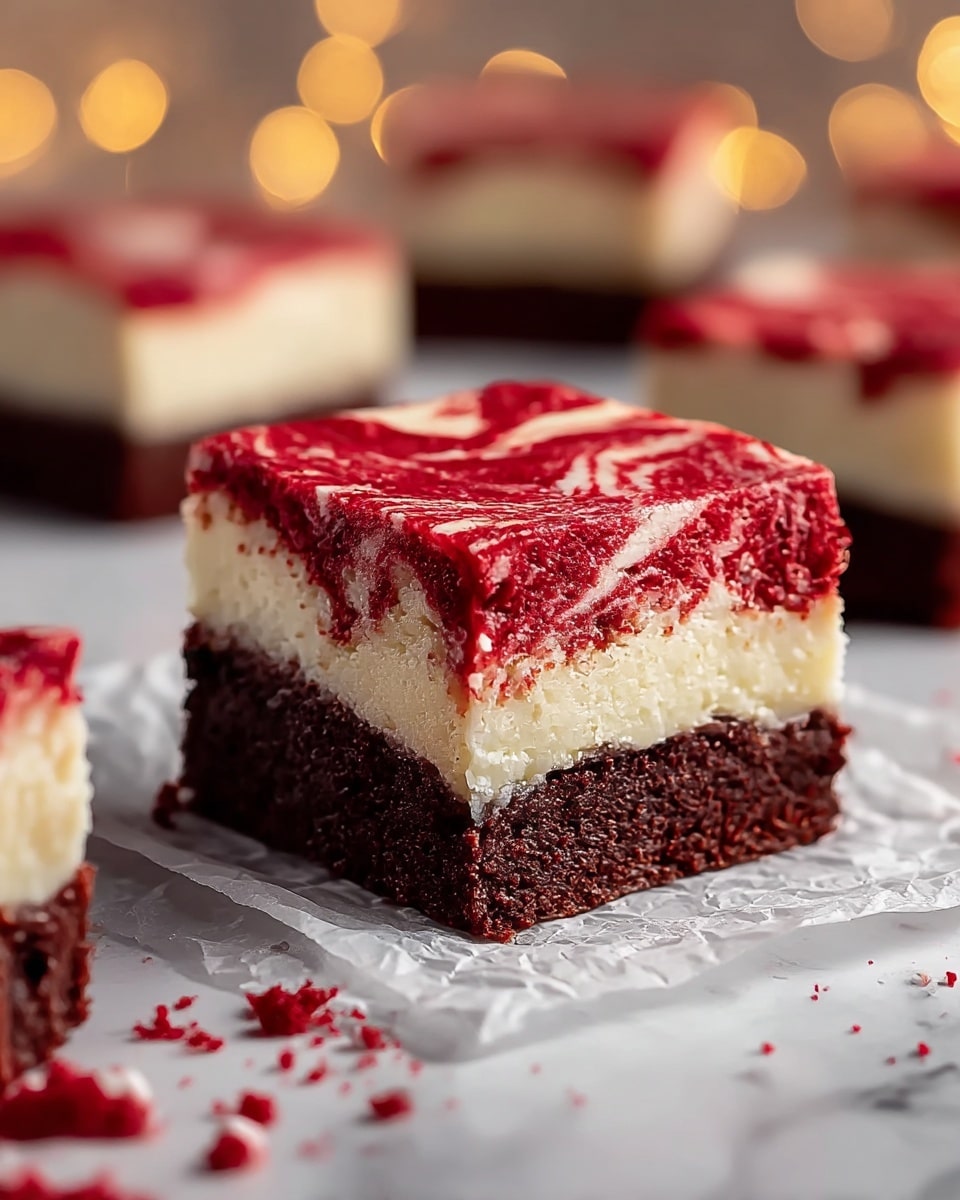
These Classic Red Velvet Brownies with a Cheesecake Layer combine the rich, fudgy texture of brownies with the creamy tang of cheesecake. The striking red and white marbled effect makes them perfect for special occasions or an indulgent treat anytime.
Ingredients
- 5 oz butter (preferably Kerrygold unsalted)
- 3/4 cup sugar
- 1 1/2 tsp vanilla extract
- 1/3 cup cocoa powder (Hershey’s Special Dark recommended)
- 1/8 tsp salt
- 1 1/2 tbsp red food coloring
- 1 tsp vinegar
- 2 large eggs (room temperature, about 70°F)
- 3/4 cup flour
- 8 oz cream cheese (Philadelphia original blocks), softened
- 1/4 cup sugar (for cheesecake layer)
- 1 large egg (for cheesecake layer)
- 1/2 tsp vanilla extract (for cheesecake layer)
Instructions
- Step 1: Preheat your oven to 375°F. Grease an 8×8 inch baking dish or 9-inch square pan with butter or cooking spray, coating both the bottom and sides evenly.
- Step 2: Melt the butter in a medium saucepan over low heat. Remove from heat and stir in 3/4 cup sugar until combined. Add vanilla, cocoa powder, salt, red food coloring, and vinegar, mixing until the mixture is a deep burgundy color.
- Step 3: Beat the room-temperature eggs lightly in a small bowl, then add to the chocolate mixture and stir until smooth. Gently fold in the flour with a spatula until just combined; avoid overmixing. Reserve 1/4 cup of this batter for the topping and set aside.
- Step 4: Pour the remaining red velvet brownie batter (about 3/4 of the mixture) into the prepared pan, spreading evenly to form the base layer.
- Step 5: In a separate bowl, beat softened cream cheese with 1/4 cup sugar until smooth and fluffy. Add the egg and vanilla extract, mixing until fully incorporated and lump-free. Spread this cheesecake mixture evenly over the brownie base layer.
- Step 6: Drop dollops of the reserved brownie batter on top of the cheesecake layer. Use a thin knife or skewer to swirl in a figure-8 or back-and-forth motion, creating a marbled effect without overmixing.
- Step 7: Bake for 30-35 minutes until the top is set but still slightly jiggly in the center. Edges should pull away from the pan. Cool on a wire rack for 1-2 hours, then refrigerate for at least 1 hour before cutting.
Tips & Variations
- Use room temperature eggs to ensure the batter mixes smoothly and evenly.
- For a more intense red color, opt for gel-based food coloring instead of liquid.
- Try adding white chocolate chips to the brownie batter for extra sweetness and texture.
- To make mini portions, bake in a muffin tin for about 20 minutes, checking doneness frequently.
Storage
Store brownies in an airtight container in the refrigerator for up to 5 days. Reheat briefly at room temperature before serving if desired. For longer storage, freeze individually wrapped brownies for up to 2 months; thaw overnight in the refrigerator.
How to Serve
Serve this delicious recipe with your favorite sides.
FAQs
Can I use regular food coloring instead of red food coloring?
You can, but red food coloring specifically enhances the signature red velvet look and flavor. Gel food coloring tends to give a more vibrant and deeper red without thinning the batter.
Do I have to refrigerate the brownies after baking?
Yes, refrigerating helps the cheesecake layer set firmly, making the brownies easier to cut and enhancing the overall texture. It also keeps them fresh longer.
Print
Classic Red Velvet Brownies with Cheesecake Layer Recipe
- Total Time: 1 hour 45 minutes (including cooling and chilling)
- Yield: 16 brownies (cut into 2-inch squares) 1x
Description
Classic Red Velvet Brownies with a luscious cheesecake layer combine the rich, fudgy texture of red velvet brownies with a creamy, tangy cheesecake topping. This dessert features a beautiful marbled effect created by swirling reserved brownie batter atop the cheesecake layer, baked to perfection for a moist and indulgent treat perfect for any occasion.
Ingredients
Brownie Layer
- 5 oz unsalted butter (preferably Kerrygold for richer flavor)
- 3/4 cup sugar
- 1 1/2 tsp vanilla extract
- 1/3 cup cocoa powder (Hershey’s Special Dark recommended)
- 1/8 tsp salt
- 1 1/2 tbsp red food coloring
- 1 tsp vinegar
- 2 large eggs (room temperature, about 70°F)
- 3/4 cup all-purpose flour
Cheesecake Layer
- 8 oz cream cheese (Philadelphia original blocks), softened
- 1/4 cup sugar
- 1 large egg
- 1/2 tsp vanilla extract
Instructions
- Preheat and Prepare Pan: Preheat your oven to 375°F. Grease an 8×8 inch baking dish or 9-inch square pan thoroughly with butter or cooking spray to ensure the brownies do not stick and release easily after baking.
- Make Brownie Batter: Melt the butter in a medium saucepan over low heat. Remove from heat and stir in sugar until combined. Add vanilla, cocoa powder, salt, red food coloring, and vinegar; stir until fully incorporated and mixture turns deep burgundy. Beat the room temperature eggs lightly, then stir into the mixture until smooth. Fold in the flour gently until just combined, avoiding overmixing. Reserve 1/4 cup of this batter for topping.
- Pour Brownie Base: Pour about 3/4 of the red velvet brownie batter into the prepared pan, spreading it evenly into the corners to create a fudgy base layer.
- Prepare Cheesecake Layer: In a bowl, beat the softened cream cheese with sugar until smooth and fluffy, about 1-2 minutes. Add the egg and vanilla, beating until fully incorporated and creamy without lumps. Spread this cheesecake mixture evenly over the brownie base layer, being careful not to disturb the layer beneath.
- Create Swirls: Spoon small dollops of the reserved 1/4 cup brownie batter over the cheesecake layer. Using a thin knife or skewer, gently swirl the batter in a figure-8 or back-and-forth motion to create marbled streaks without overmixing.
- Bake: Bake the layered brownies for 30-35 minutes until the top is set but still slightly jiggly in the center. The cheesecake should be mostly set, and edges of the brownie will begin to pull away from the pan sides.
- Cool and Chill: Remove from oven and cool the brownies on a wire rack for 1-2 hours at room temperature. For cleaner cuts and firmer cheesecake texture, refrigerate the brownies for at least 1 hour before slicing into squares.
Notes
- Use room temperature eggs to ensure smooth batter texture.
- Do not overmix the batter after adding flour to keep brownies tender.
- Use Philadelphia cream cheese blocks for consistent and creamy cheesecake layer.
- Swirling the reserved batter gently prevents mixing layers and preserves the marbled look.
- Chilling after baking is recommended for sharper, cleaner cuts.
- Adjust red food coloring quantity for desired color intensity.
- Prep Time: 15 minutes
- Cook Time: 30-35 minutes
- Category: Dessert
- Method: Baking
- Cuisine: American
Keywords: Red Velvet Brownies, Cheesecake Brownies, Swirled Cheesecake Brownies, Red Velvet Dessert, Fudgy Brownies, Marbled Brownies